Ionic is an incredibly useful framework for building HTML5 hybrid mobile apps. It is a great starting point for creating Cordova/Phonegap mobile applications as it provides common mobile app components that can be reused and adapted. Ionic also provides a very useful CLI (command line interface) that allows you to create, compile, run and export mobile apps with ease. It is continuously adding new features pushing it beyond just a front end framework. Just need to quickly put together a prototype before building a native app or responsive web app? Ionic is a great choice for prototypes too.
There is plenty of documentation on the Ionic framework, along with plenty of guides to AngularJS (which Ionic currently requires for its JS components). Thanks to this and a simple SDK, it is easy to get a quick prototype completed.
These guides will assume you’ve got a project up and running in your CLI using one of the templates found on the Ionic “Getting Started” page, for example, ionic start myApp blank. This is definitely the best way if you’re starting from scratch as you’ll get access to all of the Ionic CLI features along with their core starting template.
I’ve played around with a few ideas within the project structure looking for the best method that would be clean for my own expanding projects but would also work with the ionic Gulp set up. I didn’t want to change the default Ionic Gulp file unnecessarily.
Just put styles in www?
It may be tempting to rush into things and throw new scss files into the www folder somewhere, near the code for the Ionic styles and then add a reference to your CSS file within the index.html. Avoid that! It doesn’t work so well with the Ionic Gulp set up. Better not to add things in there.
A better way – Adding styles into ionic.app.scss
In the folder called /scss, you should find an ionic.app.scss file. This is the main SASS file that compiles all the styles for your app. This is what Ionic’s Gulp set up will refer to. Want your code to work and compile with everything else, including live refresh? The ionic.app.scss file is self explanatory. You can add plenty of new styles at the end of this file and things will work well for small and simple apps with a few customizations.
One step further – Put your custom app styles into their own folder
Chances are, your app isn’t going to stay small and simple. It is going to grow and you are going to want it to remain manageable, especially if a team of developers is involved (either now or in the future). For these reasons and more, I’d recommend splitting your custom styles into a neater set of files that mirrors Ionic’s sass files whenever we’re specifically overriding Ionic itself. Put these custom app styles into their own sub-folder.
I set up a folder which matches the app’s name within the scss folder, with the main scss file for my custom styles matching that app name too. For example, for a social networking app for ants with the name Antstagram would have its styles in scss/antstagram/antstagram.scss. Within antstagram.scss, we’d then have several @import statements to import our other scss files like _variables.scss and_items.scss for those matching our Ionic framework, along with custom files specific to our app functionality like _antmountain.scss. Speaking of _variables.scss, there are a few ways to override Ionic’s variables. I’ll explain those in my next tip.
How do I override Ionic’s color variables correctly?
Ionic comes set up with a set of styles pre-defined and ready for you to customize and use. Before defining a tonne of your own variables, have a look through the list of default variables first and use them if they’re applicable to what you’re looking to style.
These variables are all conveniently listed in www/lib/ionic/scss/_variables.scss. It is tempting for beginners to edit them here. Don’t do it! Whenever you update Ionic, your changes will be overwritten by any updates to Ionic’s variables. Generally – don’t customize anything in the www/lib folder. Leave those files as is. Pretend all of those files are completely read only. You can add to them if you’ve got another JavaScript library you’d like to use, but you’ll want to avoid customizing files in here.
The correct way to add new styles is clear in the newer versions of Ionic’s project set ups than it appears to have been in the past. In your initial project set up, you should already have the scss/ionic.app.scss we mentioned earlier. It contains guidance on where to put variable overrides. I’ll add to their method – I prefer to have variables in a separate scss file. scss/ionic.app.scss looks like this by default:
// The path for our ionicons font files, relative to the built CSS in www/css
$ionicons-font-path: "../lib/ionic/fonts" !default;
// Include all of Ionic
@import "www/lib/ionic/scss/ionic";
So, why not just re-declare variables at the end of ionic.app.scss? Why are they all at the start of the file? The reason for this is that they need to be added before the ionic import, otherwise ionic’s default values will override your defaults.
My recommended way using imports
My preferred method imports in a separate scss file called _variables.scss in my antstagram folder. This is done before anything from Ionic is imported. Then the rest of my custom styles are imported inside my main Antstagram styles after Ionic, so they can override Ionic’s styles.
@import "antstagram/variables";

// The path for our ionicons font files, relative to the built CSS in www/css
$ionicons-font-path: "../lib/ionic/fonts" !default;

// Include all of Ionic
@import "www/lib/ionic/scss/ionic";

// Include Antstagram styles
@import "antstagram/antstagram; // imports everything other than variables
I’m missing some Ionic icon fonts!
If you head to
http://ionicons.com and start using these icons, but find that there are some missing in your project, chances are Ionic didn’t install with the latest Ionicons set. Head to
http://ionicons.com, click that download button and get the latest version.
Then, we can replace the ionicons font files in www/lib/ionic/fonts with the fonts in the fonts folder of the download. It’s simple and upgrades it to the latest version.
We also replace the scss files in www/lib/ionic/scss/ionicons with the ones in the scss folder of the download. There does appear to be an additional scss file in here for animations – leave that as is and just replace the others.
You might have noticed something contradictory here. Those files are within the www/lib/ionic folder and could be changed if we upgrade Ionic right? In my opinion, this is okay in this case. We’re temporarily bringing Ionicons to the latest version while we wait for Ionic to catch up. There’s the possibility you’ll lose icons if Ionic doesn’t upgrade as quickly, but usually the next upgrade of Ionic will also include the latest version of Ionicons. It also leaves it open for future upgrades to Ionicons to arrive automatically in updates of Ionic.
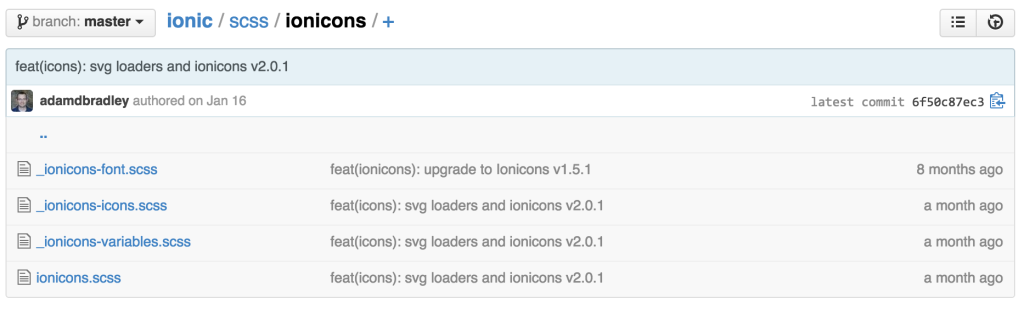
You can check to see what version of Ionicons the next version of Ionic will have by visiting their Github repo at
https://github.com/driftyco/ionic/tree/master/scss/ionicons. Chances are you’ll see the version that should be released next in the latest commit log next to the file (in this case, Ionicons v2.0.1 is coming in the next release):
Once you’ve updated your font files, you should be able to use the icon you couldn’t see before. Click q in your terminal to stop running ionic serve and then rerun ionic serve to get the latest icons.
Setting up icons that’ll display differently between iOS and Android
Ionic has several useful functions such as ionic.Platform.isIOS(), ionic.Platform.isAndroid()and ionic.Platform.isWindowsPhone() which you can use within your code to detect which icon to use. An example of this is:
var icon;

if (ionic.Platform.isIOS()) {
  icon = 'ion-ios-arrow-back';
} else if (ionic.Platform.isAndroid()) {
  icon = 'ion-android-arrow-back';
} else {
  icon = 'ion-android-arrow-back';
}
In practice I prefer to do a simpler check. If it is iOS, use the iOS icon, otherwise use Android. This won’t work as neatly if you want to specify ionic.Platform.isWindowsPhone() , however so far Ionicons have no Windows Phone specific icons so I use Android icons by default:
var icon = ionic.Platform.isIOS() ? 'ion-ios-arrow-back' : 'ion-android-arrow-back';
When this is in objects I’ll be using regularly, I turn the object into a directive which contains this logic. For example, a custom back button (replace starter with the global app name you use for your modules):
angular.module('starter.directives', [])
    .directive('backbutton', [function () {
        return {
            restrict: 'E',
            replace: true,
            scope: false,
            template: '<button class="button icon button-clear"></button>',

            compile: function (element, attrs) {
                var icon = ionic.Platform.isIOS() ? 'ion-ios-arrow-back' : 'ion-android-arrow-back';
                angular.element(element[0]).addClass(icon);
            }
        };
    }])
This creates an element of
<backbutton ng-click="goBack()"></backbutton>
that I can reuse across the app and keep up to date with any changes in one central location.
Note: There is a back button element in Ionic, however I like to create my own simpler version for some situations like custom modal windows. The example works just as well for other buttons and icons you’ll want to use too
One thing you’ll soon notice if you add in a custom element into the header, like my custom search box:
Is that on iOS, your element will be stuck behind the time and signal strength:
Ionic has specific classes to deal with this – platform-ios and platform-cordova. Ionic’s pre-built elements target those classes and add in 20px top margin to the buttons in your header to make up for these situations. To get my own custom elements to do the same, I follow the same pattern. For my .search-barabove, I add a margin if we’ve got a .platform-ios.platform-cordova:not(.fullscreen) body class:
.platform-ios.platform-cordova:not(.fullscreen) .search-bar {
    margin-top: 20px;
}
This fix brings my search box back in line:
Conclusion
Ionic seems to be growing and getting stronger every month. The community is building and the framework has some exciting things coming (like
push notifications!). Hopefully the tips I’ve shared help those looking to embark on an Ionic journey of their own!